


Transforming the look and feel of your room doesn’t always require a major overhaul. Sometimes, a simple update to your window treatments can make a significant difference. With DIY blind makeover ideas, you can refresh your space without the need for expensive renovations. Let’s explore how easy it is to elevate your room’s ambiance with these simple and budget-friendly projects.
Assessing Your Current Blinds
Before embarking on a DIY blinds makeover, it’s essential to assess the condition and suitability of your existing blinds. Evaluating your current blinds will help you determine whether they can be refurbished or if replacement is necessary. Let’s break down the key steps to effectively assess your blinds.
Condition and Functionality
Take a close look at the condition of your blinds, checking for any signs of wear and tear. Look out for issues such as frayed cords, broken slats, or damaged mechanisms. Test the functionality of the blinds by opening and closing them to ensure they operate smoothly without any difficulties or obstructions.
Aesthetic Appeal
Consider the overall aesthetic appeal of your blinds in relation to your room decor. Evaluate whether the style, color, and material of the blinds complement the existing design scheme or if they appear outdated or out of place. Determine if minor updates like cleaning or minor repairs could improve their appearance.
Compatibility with Room Decor
Assess how well your blinds integrate with the rest of your room decor. Consider factors such as the color palette, texture, and overall style of your space. Determine whether the blinds enhance the cohesive look of the room or if they clash with other elements. This will help you decide whether to refurbish or replace them.
Practical Considerations
Think about the practical aspects of your blinds, including their ability to control light and privacy. Evaluate whether the blinds effectively block out sunlight when needed and provide adequate privacy for your space. Consider if there are any additional features or enhancements that could improve their functionality.
Budget and Timeline
Factor in your budget and timeline for the DIY blinds makeover project. Consider the cost and time involved in refurbishing your existing blinds versus purchasing new ones. Take into account any other expenses associated with the project, such as materials and tools. Choose the option that aligns best with your financial resources and schedule.
Assessing your current blinds thoroughly will help you make informed decisions about whether to refurbish or replace them as part of your DIY blinds makeover. By considering factors such as their condition, aesthetic appeal, compatibility, practicality, budget, and timeline, you can determine the best course of action for achieving the desired look and functionality for your space.
Choosing the Right Materials and Tools
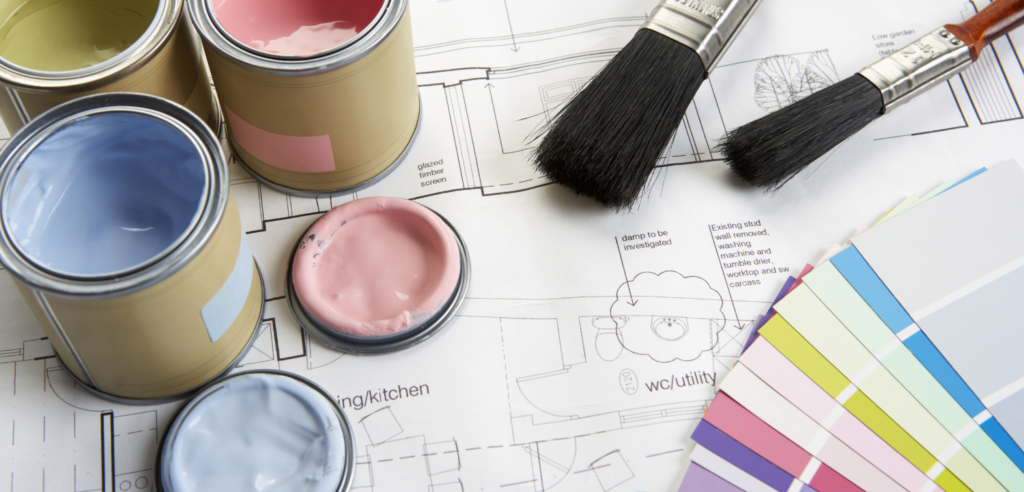
When undertaking a DIY blinds makeover, selecting the appropriate materials and tools is crucial to ensure successful results. From fabrics and paints to adhesives and accessories, each element plays a vital role in transforming your blinds. Let’s delve into the key considerations when choosing materials and tools for your project.
Materials for Blinds Makeover
Before you begin your DIY blinds makeover, gather the following materials:
1. Fabric: Choose fabrics that complement your room’s decor and suit the desired look for your blinds. Consider factors such as color, pattern, and texture when selecting fabric options.
2. Paints: Opt for paints suitable for the material of your blinds, whether they’re fabric, wood, or plastic. Select colors that coordinate with your room’s color scheme and allow for creativity in your design.
3. Adhesives: Use adhesives such as fabric glue or adhesive spray to attach fabric to your blinds or to adhere embellishments like trim or beads.
4. Embellishments: Explore a variety of embellishments like trim, tassels, beads, or ribbon to add decorative elements to your blinds and enhance their visual appeal.
Tools for Blinds Makeover
Equip yourself with the necessary tools to facilitate your DIY blinds makeover:
1. Scissors: A sharp pair of scissors is essential for cutting fabric, trim, or other materials to size.
2. Paintbrushes: Choose paintbrushes suitable for the type of paint you’re using and the intricacy of your design. Consider having different sizes on hand for various painting techniques.
3. Sewing Supplies: If you’re incorporating fabric into your blinds makeover, basic sewing supplies like needles, thread, and pins will be necessary for hemming and attaching fabric.
4. Measuring Tape: Accurate measurements are crucial for ensuring that your blinds fit properly and that any fabric or trim is cut to the correct size.
5. Safety Equipment: Depending on the materials and techniques you’re using, safety equipment such as gloves, goggles, or masks may be necessary to protect yourself during the makeover process.
When choosing materials and tools for your DIY blinds makeover, prioritize quality and suitability for your project. By carefully selecting the right materials and tools, you’ll set yourself up for success and create blinds that enhance the aesthetic of your room while reflecting your personal style.
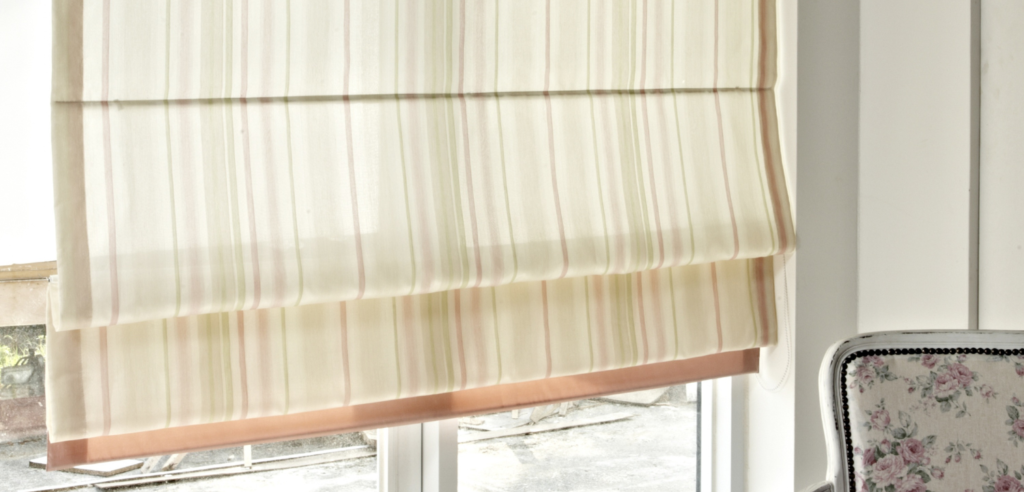
Simple Fabric Upgrades
Transforming your blinds with fabric upgrades is a simple and effective way to add a touch of style and personality to your space. Whether you’re looking to soften the look of your blinds, add a pop of color, or coordinate them with your room decor, fabric upgrades offer endless possibilities. Let’s explore how to execute simple fabric upgrades for your blinds.
Choosing the Right Fabric
The first step in fabric upgrades is selecting the right fabric for your blinds. Consider the following factors:
1. Fabric Type: Choose a fabric that suits the style and functionality of your blinds. Options include lightweight cotton for a casual look, durable canvas for a more rugged aesthetic, or elegant silk for a touch of luxury.
2. Color and Pattern: Coordinate the fabric color and pattern with your room’s decor. Opt for solid colors for a timeless look or experiment with patterns like stripes, florals, or geometric designs to add visual interest.
3. Light Filtering: Consider the level of light filtering you desire. Sheer or semi-sheer fabrics allow light to filter through, creating a soft and airy ambiance, while opaque fabrics provide more privacy and light control.
Preparing the Blinds
Once you’ve chosen your fabric, it’s time to prepare the blinds for the upgrade:
1. Measure: Measure the dimensions of your blinds carefully, accounting for any overlap or excess fabric needed for hemming.
2. Cut Fabric: Using sharp scissors, cut the fabric to size, leaving a few inches of excess on all sides for hemming.
3. Hemming: Fold and hem the edges of the fabric to create clean and finished edges. You can use fabric glue or sew the hems for a more secure finish.
Attaching the Fabric
Now it’s time to attach the fabric to your blinds:
1. Adhesive Method: Apply fabric glue or adhesive spray to the backside of the fabric and press it firmly onto the blinds, smoothing out any wrinkles or bubbles as you go.
2. Sewing Method: If you prefer a more permanent attachment, use a sewing machine or needle and thread to stitch the fabric directly onto the blinds, following the edges of the slats.
3. Finishing Touches: Once the fabric is securely attached, trim any excess fabric and ensure that the blinds operate smoothly without any obstruction.
Simple fabric upgrades offer a quick and budget-friendly way to breathe new life into your blinds and enhance the overall aesthetic of your room. Experiment with different fabrics, colors, and patterns to create blinds that reflect your personal style and elevate the look of your space.
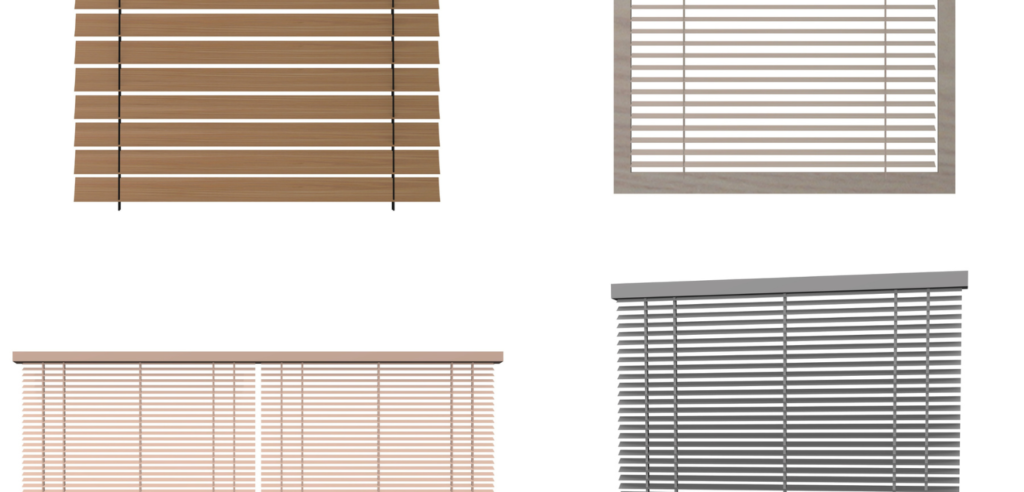
Painting Techniques for Blinds
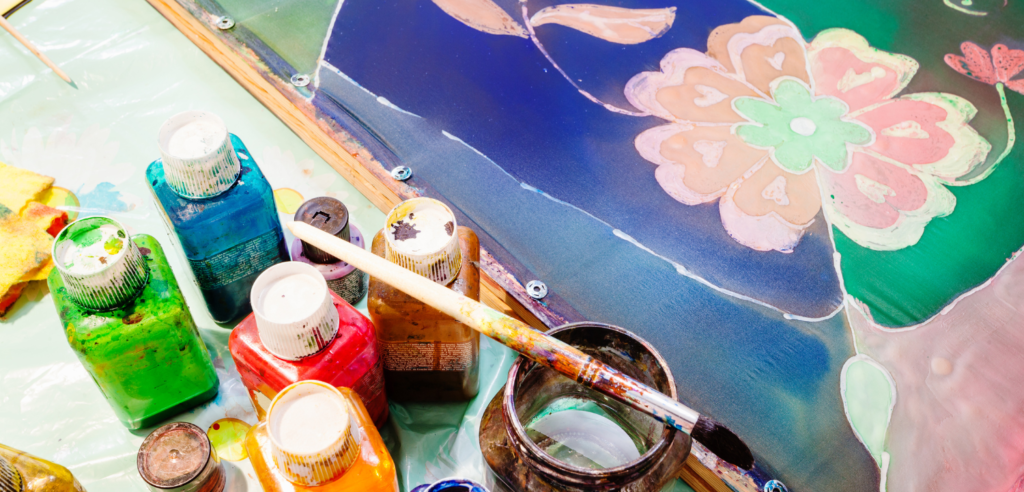
Painting your blinds offers a creative way to customize their appearance and seamlessly integrate them into your room decor. Whether you prefer a subtle monochrome look or a bold pop of color, there are various painting techniques you can use to achieve the desired effect. Let’s explore some popular painting techniques for blinds and how to execute them effectively.
Solid Color Paint
One of the simplest painting techniques for blinds is applying a solid color paint. This method allows you to completely change the color of your blinds to match your room’s decor. Here’s how to do it:
- Preparation: Clean the blinds thoroughly to remove any dust or debris. Tape off any areas you don’t want to paint, such as the mechanisms or cords.
- Paint Application: Use a high-quality paint suitable for the material of your blinds, such as acrylic or latex paint. Apply the paint evenly using a paintbrush or roller, working in smooth, even strokes.
- Drying Time: Allow the paint to dry completely according to the manufacturer’s instructions before rehanging the blinds.
Stenciling
Stenciling is a popular technique for adding intricate designs or patterns to blinds. Here’s how to stencil your blinds:
- Stencil Selection: Choose a stencil design that complements your room’s decor. Secure the stencil in place on the blind using painter’s tape.
- Paint Application: Dip a stencil brush or foam brush into your chosen paint color, then dab off any excess paint onto a paper towel. Lightly dab the brush over the stencil, being careful not to apply too much paint at once.
- Multiple Layers: For more complex designs, you may need to apply multiple layers of paint, allowing each layer to dry before adding the next.
- Finishing Touches: Once the paint is dry, carefully remove the stencil to reveal the design. Touch up any areas as needed, then allow the paint to fully cure before rehanging the blinds.
Ombre Effect
Create a subtle gradient effect on your blinds with an ombre painting technique. Here’s how to achieve this look:
- Color Selection: Choose two or more paint colors that blend well together and complement your room’s color scheme.
- Gradient Application: Start by applying the darkest paint color to the bottom of the blinds, gradually blending it into the lighter color(s) as you move upward. Use a paintbrush or sponge to blend the colors together smoothly.
- Feathering Technique: To create a seamless transition between colors, use a feathering technique where you lightly brush or sponge the edges of each color into the next.
- Final Touches: Once you’re satisfied with the gradient effect, allow the paint to dry completely before rehanging the blinds.
Experiment with different painting techniques and color combinations to create blinds that are truly unique and tailored to your personal style. Whether you opt for a solid color, intricate stencil design, or subtle ombre effect, painting your blinds offers endless possibilities for customization and creativity.
Embellishments and Accessories

Elevate the look of your DIY blinds makeover with embellishments and accessories that add flair and personality to your window treatments. From decorative trims to functional hardware, these finishing touches can transform ordinary blinds into stylish design statements. Let’s explore some popular embellishments and accessories to enhance your blinds.
Decorative Trims
Add a touch of elegance to your blinds with decorative trims that create visual interest and texture. Consider options such as:
- Beaded Trim: Delicate beaded trim adds a subtle shimmer and sophistication to your blinds, perfect for enhancing a glamorous or eclectic decor style.
- Pom-Pom Trim: Playful pom-pom trim injects a whimsical charm into your space, ideal for creating a fun and vibrant atmosphere in children’s rooms or eclectic bohemian settings.
- Tassel Trim: Elegant tassel trim adds a touch of refinement and luxury to your blinds, elevating them to a higher level of sophistication and elegance.
Functional Hardware
In addition to decorative embellishments, consider incorporating functional hardware that enhances the usability and practicality of your blinds:
- Cord Cleats: Install cord cleats to neatly secure blind cords, preventing them from tangling or posing a safety hazard, especially in homes with children or pets.
- Rings and Hooks: Use rings and hooks to easily raise and lower your blinds, ensuring smooth operation and extending their lifespan.
- Valances and Cornices: Finish off your blinds with valances or cornices that conceal the headrail and provide a polished, cohesive look to your window treatments.
Fabric Tiebacks
For blinds that feature fabric panels or drapery, fabric tiebacks offer a decorative and functional solution for holding the fabric in place when the blinds are open. Choose tiebacks that coordinate with your fabric choice and room decor for a cohesive look.
Embellishment Application
When adding embellishments and accessories to your blinds, keep the following tips in mind:
- Placement: Strategically place embellishments along the edges or seams of your blinds to accentuate their shape and design.
- Balance: Maintain a balanced distribution of embellishments throughout the blinds to avoid overwhelming the overall look.
- Compatibility: Ensure that the chosen embellishments complement the style and aesthetic of your room decor for a cohesive and harmonious look.
By incorporating decorative trims, functional hardware, fabric tiebacks, and other embellishments into your DIY blinds makeover, you can customize your window treatments to reflect your personal style and enhance the beauty of your space. Experiment with different options to create blinds that are both visually stunning and practical for everyday use.
Smart Solutions for Privacy and Light Control
Enhancing privacy and controlling light are essential aspects of window treatments, including blinds. With smart solutions, you can optimize these functionalities while adding convenience and efficiency to your living space. Let’s explore some smart strategies for achieving privacy and light control with your blinds.
Automated Blinds
Investing in automated blinds offers a modern and convenient solution for controlling privacy and light levels in your home. With automated blinds, you can program them to open and close at specific times of the day or adjust them remotely using a smartphone app. This allows for effortless customization and ensures optimal privacy and light control throughout the day.
Motorized Controls
Motorized controls provide another level of convenience and flexibility when it comes to managing your blinds. With the touch of a button, you can raise or lower your blinds to your desired position, allowing for quick adjustments to privacy and light levels. Motorized controls are especially beneficial for hard-to-reach windows or large window treatments where manual operation may be challenging.
Smart Home Integration
Integrating your blinds with a smart home system allows for seamless control and automation of your window treatments. By connecting your blinds to smart home devices like voice assistants or home automation hubs, you can effortlessly adjust them using voice commands or preset schedules. This integration enhances convenience and efficiency while ensuring optimal privacy and light control throughout your home.
Light-Filtering and Blackout Options
Choose blinds with light-filtering or blackout capabilities to tailor the level of privacy and light control to your preferences. Light-filtering blinds allow diffused natural light to enter your space while providing privacy, making them ideal for living areas and offices. On the other hand, blackout blinds offer complete light blockage, perfect for bedrooms or media rooms where darkness is desired.
Privacy Films
For added privacy without sacrificing natural light, consider applying privacy films to your windows. These adhesive films obscure the view from outside while still allowing light to filter through, offering an effective solution for maintaining privacy in high-traffic areas or rooms with large windows. Privacy films come in various patterns and opacities to suit your aesthetic preferences.
Top-Down, Bottom-Up Blinds
Opt for blinds with a top-down, bottom-up operation for enhanced versatility in privacy and light control. This design allows you to raise the blinds from the bottom or lower them from the top, giving you the flexibility to adjust the positioning of the blinds according to your privacy and light preferences while still allowing natural light to enter your space.
By incorporating these smart solutions into your blinds, you can enjoy enhanced privacy, optimal light control, and added convenience in your home environment. Whether you opt for automated controls, smart home integration, or specialized blind options, these strategies empower you to create a comfortable and efficient living space tailored to your needs.
Finishing Touches and Maintenance Tips
After completing your DIY blinds makeover, it’s important to add the finishing touches that enhance their appearance and ensure their longevity. Additionally, regular maintenance is key to preserving the beauty and functionality of your blinds over time. Let’s explore some essential finishing touches and maintenance tips to keep your blinds looking their best.
Adding Decorative Accents
To complete the look of your blinds and tie them into your room decor, consider adding decorative accents such as:
- Valances: Install a valance at the top of your blinds to conceal the headrail and create a polished, cohesive look.
- Cornices: Opt for a cornice box to add architectural interest and frame your blinds, enhancing their visual impact.
- Decorative Pulls: Customize your blinds with decorative pulls or tassels that complement your chosen design aesthetic.
- Window Treatments: Layer your blinds with curtains, drapes, or sheers to add depth and dimension to your windows while further enhancing privacy and light control.
Maintenance Tips
Regular maintenance is essential for prolonging the life of your blinds and keeping them in optimal condition. Here are some maintenance tips to follow:
1. Dusting: Dust your blinds regularly with a soft cloth, duster, or vacuum attachment to remove accumulated dust and debris. This prevents dust buildup and maintains a clean appearance.
2. Spot Cleaning: Spot clean any stains or spills on your blinds promptly using a mild detergent or gentle cleaning solution and a clean cloth. Avoid using harsh chemicals or abrasive cleaners that could damage the blinds.
3. Vacuuming: Use a brush attachment on your vacuum cleaner to gently remove dust and debris from the slats or fabric panels of your blinds. Be careful not to apply too much pressure to avoid damaging the blinds.
4. Professional Cleaning: Consider scheduling professional cleaning for your blinds annually or as needed, especially for fabric blinds or those in high-traffic areas.
5. Inspecting for Damage: Regularly inspect your blinds for signs of wear and tear, such as frayed cords, broken slats, or malfunctioning mechanisms. Address any issues promptly to prevent further damage and ensure continued functionality.
6. Lubricating Mechanisms: Lubricate the moving parts of your blinds, such as the cords and pulleys, periodically to ensure smooth operation and prevent sticking or jamming.
By adding the finishing touches and following these maintenance tips, you can preserve the beauty and functionality of your DIY blinds makeover for years to come. With proper care and attention, your blinds will continue to enhance the aesthetic of your space while providing privacy, light control, and comfort for you and your family.
Conclusion
In conclusion, a DIY blinds makeover offers endless possibilities for transforming your space and adding personalized touches to your window treatments. Whether you’re updating the look of existing blinds or creating custom designs from scratch, the process allows for creativity, flexibility, and customization to suit your style and preferences. By following the outlined steps and incorporating smart solutions for privacy, light control, and maintenance, you can achieve stunning results that enhance the aesthetic appeal and functionality of your home. With attention to detail and proper care, your DIY blinds makeover will not only elevate the look of your space but also provide long-lasting enjoyment and satisfaction.